Android phones come with a built-in calendar that can be used to subscribe to events or to schedule/manage calendars. Unfortunately, Android does not natively support protocols Caldav and Webcal (with authentication), which are used in PSMail. However, if you want to sync your PSCalendar to your android device, a third party application called Caldav-Sync (Google Play) can help you integrate your PSCalendar system using these protocols in a secure way.
The following steps will show you how to do it:
Step 1: Install the Caldav-Sync app on your Android device (you can find it in the Google Play store).
Step 2: Open the Caldav-Sync application.
Step 3: You will see an Add Account menu. Choose Caldav for your own calendar.
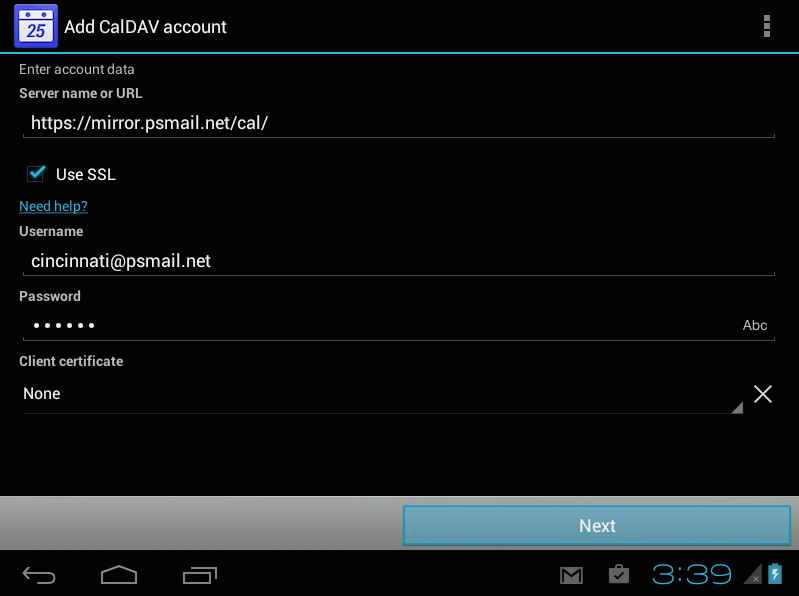
Step 4: Next, enter the details as shown below, using your own primary PSMail address as the Username. For Password, use your PSMail account password.

Step 5: On the next screen, use your primary email address as the identifier for this account.
That’s it! You’re set up. Now, if you have friends who have given you permission to view their PSMail calendar, you can also open all their shared calendars using the “Webcal” method. Follow these instructions to integrate other calendars that have been shared with you.
Step 1: Open the Caldav-Sync application.
Step 2: You will see an Add Account menu; choose Webcal for your own calendar.
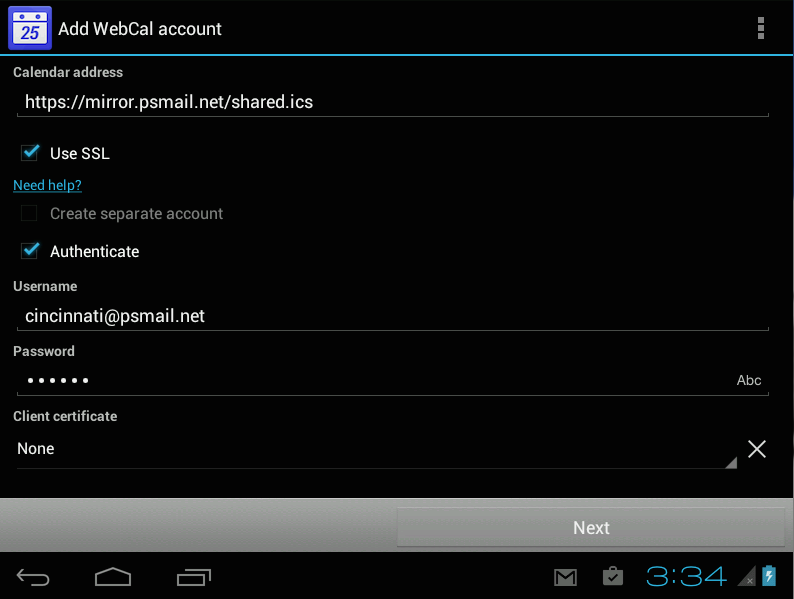
Step 3: Next, enter the details as shown below for your Webcal subscription account. Enter your own primary PSMail address for Username, and your PSMail account password for Password.

Step 4: Click Next. You’ll now be asked for the email account associated with this calendar. Enter username+shared@psmail.net if your primary PSMail email address is username@psmail.net
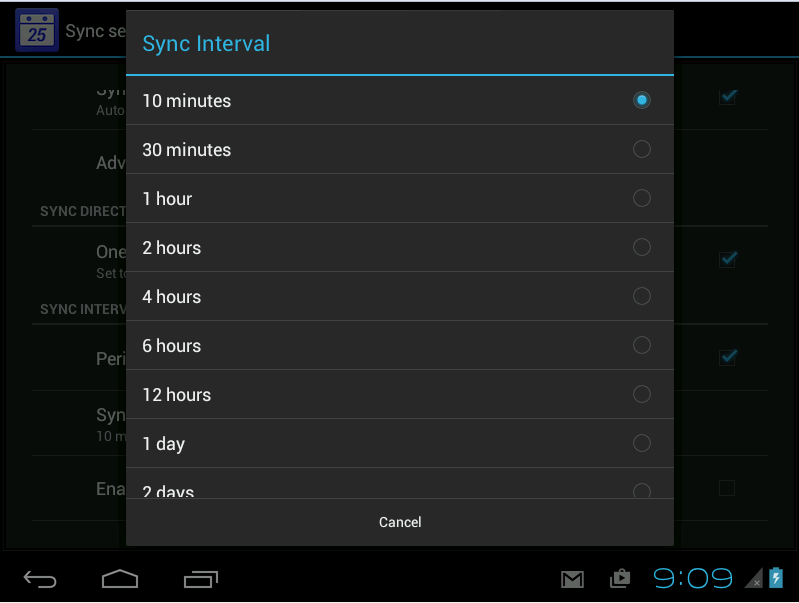
Step 5: In the advanced options we recommend that you use 10 minutes as the synching frequency.

All the entries will now be integated into your Android Calendar app. To update passwords and account information, you can use Android’s native Accounts & Sync or the Caldav-Sync account management screens.