Publishing Your Calendar
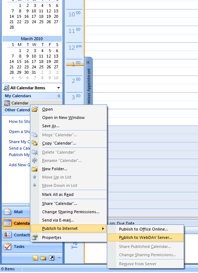
Step 1: In Calendar, in the navigation pane (the column on the left side of the Outlook window that includes tabs for Shortcuts, Mail, etc.), right-click the calendar that you want to share. On the shortcut menu, point to Publish to Internet, and then click Publish to WebDAV Server.
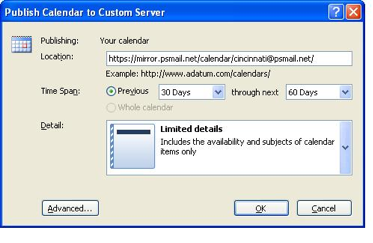
Step 2: In the Location box, type the location of the Web server and folder as https://mirror.psmail.net/calendar/username%40psmail.net/ if your email address is username@psmail.net.
Leave the other options as default.
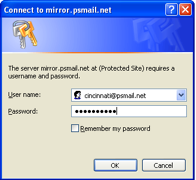
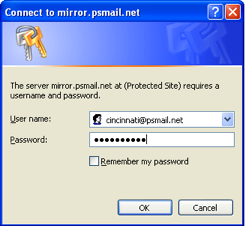
Step 3: Click OK to close this window. The system will now prompt you for a password. Enter your PSMail email address and password and click OK.
Step 4: When prompted, click yes to Send a Sharing Invitation and send this email to yourself so you can preserve a copy of your calendar URL for others who you want to share your calendar with in the future. In order for other users to see your calendar entries, they will need to be authenticated by you and know this unique URL. This URL can be used by iCal for MAC users and by Sunbird plugin for Thunderbird users to share your calendar (as long as they are also PSMail users).

Publishing Your Free/Busy Information (Availability)
Step 1: Outlook can publish and collect “Free/Busy” information from PSMail servers in a secure way. This setup is simple and is tested for publishing on PSMail’s calendar publishing server. In Outlook 2007 click on Tools, then Options, and then finally on Calendar Options.
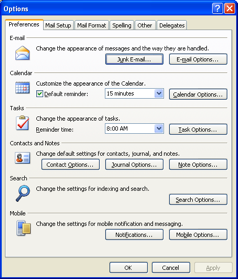
Step 2: You will see options like in the window below. Now click the Other Free/Busy button.
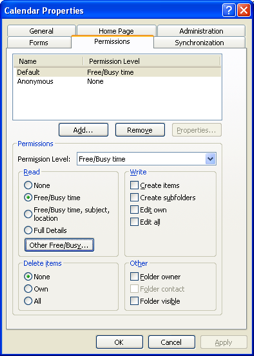
Step 3: In the new window, enable the option Publish at my location. In the location window type https://mirror.psmail.net/calendar/username%40psmail.net/username.fsb if your email address is username@psmail.net.
In the Search Location box type in the following exactly (copy and paste for convenience if necessary): https://mirror.psmail.net/calendar/%NAME%@%SERVER%/%NAME%.fsb
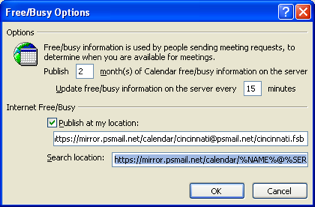
Step 4: Click on OK (a few times) and you will be prompted to publish your calendar on the calendar site through https: (SSL encryption). Enter your email address and password as shown below and click OK.
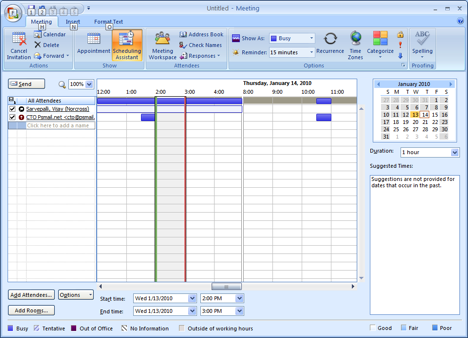
Now if anyone wants to schedule a meeting or appointment with you, they will be able to see your availability as seen in the example below.
