Often this indicates a problem with your settings either after a recent software update or from a plugin software like antivirus. Follow these steps to ensure that your account is set up correctly. On a Mac, it is also highly recommended that you DISABLE “automatically manage connection settings” option. As this settings can reset your outgoing settings to a non-work default values.
Follow these steps to setup the correct outgoing settings
Step 1: Open Mac Mail App.
Step 2: Select Mail and then Preferences from the menu.
Step 3: Select the Accounts tab.
Step 4: Select the mail account you need to modify from the Accounts list on the left side of the window.
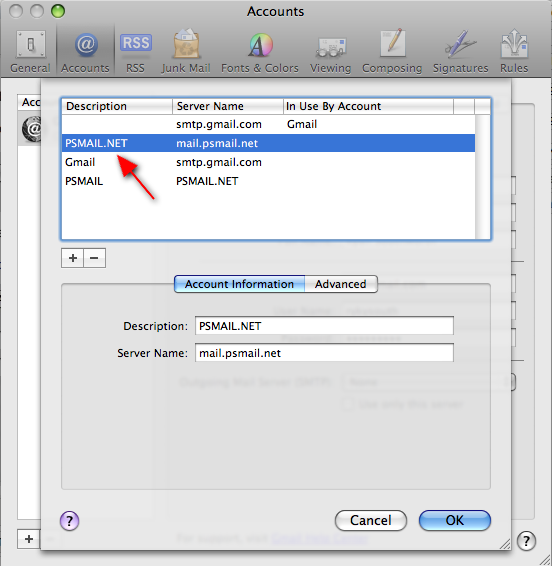
Step 5: At the bottom right side of the window select Edit Server List from the Outgoing Mail Server (SMTP) dropdown menu.

Step 6: Select PSMail from the list of SMTP Servers.

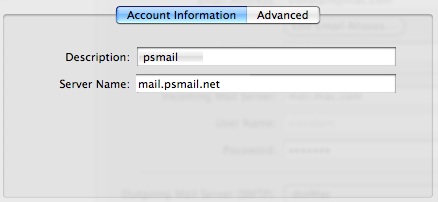
Step 7: Under the Account Information tab, set the Server Name to “mail.psmail.net”.

Step 8: Select the Advanced tab.
Step 9: Set your port to “465”. Make sure the Use Secure Sockets Layer (SSL) box is selected. Then select Password from the Authentication dropdown.

Step 10: Enter your PSMail primary email address as your username. (DO NOT use alias or other usernames).

Step 11: Click Ok. If it asks you to save, click Save.
To test your setup, try sending an email to yourself. If you have any problems with setup, or have any further questions, please contact our helpdesk by clicking here.